Posts

3D Printed Chess Set

Image
For my Chess set I wanted to go with a design inspired by the more traditional pieces but with a bit of a Gothic twist such as caped wings like gargoyles with the popular V gesture for strong upright poses.  After I thought of the armor bands I wanted to use it as a motif to make the designs more relative as well to represent the type of relationship the monarchy with the pawns being treated as sacrificial with the rest highly valued strategically. 

3D Printed Rings

Image
For my rings I had a mix of clunky geometric shapes laid over organic shapes, I had different concepts for rings from double fingered rings and rings that went on in reverse. I have a phobia after hearing stories of people who lose their fingers from accidents with rings so I made the rings open so that under strain they will pop off or break for user safety. I chose the 3 rings based on the strength of their gesture and I chose the one I dubbed Speed Ring on export as I found it captured that concept of motion nicely. Responses like the bubble ring more in it's shape and profile however after rendering it out I found some technical errors with filleting the sockets for the bubbles as well the final design had structural problems in the way the underside was lofted so I opted for the speed shaped ring instead. I added a cone on the underside of the backdraft section as I was concerned for the structural integrity, an additional part I would change would be extruding the ring b

Digital Object Final

Image
For my reverse engineered project I chose a flashlight given that it's built to be disassembled so I was able to access a lot more small details in the design. I really like how the case turned out especially the lens case and the main body as I was able to model all the subtractions the original model had. The hardest part was actually the button since the subtraction and inset of the button was too cramped to measure so I ended up doing my best estimating from what measurements I could take. 2 details I didnt have time to finish were the divets on the flashlight head and the wriststrap attached to the bottom however I think I learned a lot from what I was able to finish.

Digital Object Progress 4

Image
This week was finishing the battery case and the screw thread for each piece to connect. I need a little more time to finish the indents and the button on the body of the flashlight and a small fillet to the case for the lens. Hopefully I can finish that and render it within the next session I have on Rhino 3D. There was the wrist strap that connected at the bottom of the flashlight as well as the conductive strips inside the battery case but it depends on how my other major projects pan out. I think for me to finish it here would be too easy since the last details are minor but I think they are important enough to the flashlights original design that I should see it through.

Digital Object Progress 3

Image
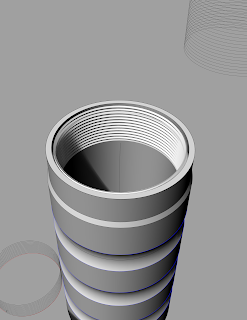
October 22, 2018 I had an early day last class since I had a morning appointment elsewhere so I got a good 7 hours of work in, class time included, I don't have much to say since as you can see I was able to produce most of the parts including some detailed or curved sections without difficulty, at this point I'm almost done all the general shapes and it'll just be the minor details after that. I'm keeping in mind the layers so I will be able to keep track of the different parts internal and external by colour coding them as well I'm also looking at setting the different render materials like the bulb translucency.

Digitized Object: Progress 2

Image
So far I've used my preliminary measurements to build some construction lines to build all my surfaces for the main body and lens casing. I don't know how to hand the curves and curved indents on the casing so I'll leave that for last since it will likely be subtracted from the main body. It's not much to show but given the speed I was able to construct the current curves it'll be more dependent finding time around classes to finish the legwork.